Why You’ll Love This Icebox Cake
If you are looking for a fast Icebox Cake that feels special without turning on the oven, this berry-packed treat is a perfect fit. It brings together sweet whipped cream, juicy strawberries, fresh blueberries, and soft graham crackers for a dessert that looks beautiful and tastes even better after chilling.
This is the kind of no bake cake that saves the day for busy nights, summer gatherings, and last-minute guests.
- Easy to make: This no bake cake comes together with simple layering and very little hands-on time. There is no baking, no complicated decorating, and no special equipment needed.
- Fresh and light: The mix of berries, whipped cream, and graham crackers gives you a dessert that feels sweet but not too heavy. It is a great no bake dessert for warm weather.
- Flexible for many diets: With a few swaps, this icebox cake recipe can be adjusted for different needs, including gluten-free or lower sugar versions.
- Bright berry flavor: The strawberries and blueberries add color, freshness, and a juicy bite that makes this berry icebox cake stand out from other chilled desserts.
For readers who love fruity recipes, you may also enjoy this beautiful fruit charcuterie board for easy entertaining from Maestro Recipe. It pairs well with the same fresh, colorful feel that makes this dessert so popular.
Jump to:
- Why You’ll Love This Icebox Cake
- Essential Ingredients for Icebox Cake
- Main Ingredients
- Ingredient Notes
- Special Dietary Options
- How to Prepare the Perfect Icebox Cake: Step-by-Step Guide
- First Step: Prep your ingredients
- Second Step: Make the whipped cream
- Third Step: Build the first layer
- Fourth Step: Continue layering
- Fifth Step: Smooth the top and garnish
- Final Step: Chill until set
- Dietary Substitutions to Customize Your Icebox Cake
- Protein and Main Component Alternatives
- Vegetable, Sauce, and Seasoning Modifications
- Mastering Icebox Cake: Advanced Tips and Variations
- Pro cooking techniques
- Flavor variations
- Presentation tips
- Make-ahead options
- How to Store Icebox Cake: Best Practices
- Refrigeration
- Freezing
- Reheating
- Meal prep considerations
- FAQs: Frequently Asked Questions About Icebox Cake
- What is icebox cake?
- Can I use frozen berries in icebox cake?
- How long does icebox cake need to chill?
- Can I make icebox cake ahead of time?
- What cookies work best for icebox cake?
- Icebox Cake
- Ingredients
- Instructions
- Last Step:
- Notes
- Nutrition
- Did you make this recipe?
Essential Ingredients for Icebox Cake
This easy berry icebox cake uses a short list of ingredients, but each one plays an important role. The whipped cream keeps the texture soft and creamy, the graham crackers turn tender as they chill, and the berries add fresh flavor in every bite.
Main Ingredients
- 3 cups cold heavy cream or heavy whipping cream – Whips into the fluffy base that holds the layers together.
- 1/3 cup confectioners’ sugar – Sweetens the whipped cream and helps it stay smooth.
- 2 teaspoons pure vanilla extract or vanilla bean paste – Adds warm, sweet flavor to the cream.
- 1/2 teaspoon pure almond extract – Brings a light nutty note that makes the dessert taste special.
- 20 to 21 full-sheet graham crackers – Create the layered structure and soften into cake-like layers after chilling.
- 2 cups sliced fresh strawberries – Add juicy berry flavor and a bright red color.
- 1 cup fresh blueberries – Add sweetness, texture, and a pop of color.
- Optional additional berries for garnish – Make the finished dessert look extra pretty and festive.
Ingredient Notes
Use very cold cream for the best whipped texture. Fresh berries work best because they hold their shape and do not add too much liquid. If your strawberries are large, slice them thin so they layer easily. Graham crackers should be arranged tightly so the dessert cuts neatly after chilling.
| Ingredient | Purpose | Helpful Tip |
|---|---|---|
| Heavy cream | Creates the fluffy filling | Chill the bowl first for better whipping |
| Confectioners’ sugar | Adds sweetness | Sift if it is clumpy |
| Graham crackers | Builds the layers | Use full sheets for cleaner stacking |
| Fresh berries | Add flavor and freshness | Pat dry before layering |
Special Dietary Options
- Vegan: Use plant-based whipping cream, vegan graham crackers, and a dairy-free sweetener.
- Gluten-free: Choose certified gluten-free graham-style crackers or gluten-free vanilla cookies.
- Low-calorie: Use a lighter whipped topping, reduce the sugar, and add extra berries for sweetness.
How to Prepare the Perfect Icebox Cake: Step-by-Step Guide
Making this berry icebox cake no bake recipe is simple, but a few small details help the layers set up beautifully. The key is to whip the cream until it holds its shape, layer everything evenly, and give the dessert enough time to chill. If you are new to making a simple berry icebox cake recipe, do not worry. This method is easy to follow and friendly for beginners.
First Step: Prep your ingredients
Gather all of your ingredients before you begin. Wash the strawberries and blueberries, then pat them dry with a clean towel. Slice the strawberries so they are ready for layering. If you want a neat finish, line an 8×8 inch baking dish with parchment paper, leaving a little overhang on the sides for lifting later.
Cold ingredients matter here. Keep the heavy cream in the refrigerator until you are ready to whip it. A chilled bowl and whisk also help the cream thicken faster. This small step makes the process smoother and gives the dessert a lighter texture.
Second Step: Make the whipped cream
Pour the 3 cups of cold heavy cream into a large mixing bowl. Add the 1/3 cup confectioners’ sugar, 2 teaspoons pure vanilla extract or vanilla bean paste, and 1/2 teaspoon pure almond extract. Beat the mixture with a hand mixer or stand mixer on medium-high speed until stiff peaks form.
Stiff peaks mean the cream holds its shape when you lift the beaters. Be careful not to overmix, or the cream can turn grainy. You want it fluffy, smooth, and easy to spread. This sweetened cream is the heart of your icebox cake recipe.
Third Step: Build the first layer
Spread a thin layer of whipped cream on the bottom of your dish. This helps the graham crackers stay in place. Add a full layer of graham crackers on top, breaking a few pieces as needed so the entire bottom is covered.
Next, spread more whipped cream over the crackers. Add a layer of sliced strawberries and blueberries on top of the cream. Try to spread the fruit evenly so every slice gets some berry flavor. This is what gives the dessert its bright, fresh taste and makes it a true easy berry icebox cake.
Fourth Step: Continue layering
Repeat the layers until all ingredients are used, finishing with whipped cream on top. In most cases, you will get several layers of crackers, cream, and berries in your dish. Press gently as you go, but do not push too hard. The layers should stay even and soft.
If you like a more fruit-forward dessert, add a little extra strawberries and blueberries between each layer. If you want a more classic texture, use a lighter amount of fruit and let the graham crackers shine. Either way, the dessert will still taste wonderful after chilling.
Fifth Step: Smooth the top and garnish
Use a spatula to smooth the top layer of whipped cream. Then add the optional additional berries for garnish. This little touch makes the cake look fresh and ready for a party table, family dinner, or weekend treat.
If you want a more polished look, place a few strawberry slices around the edges and scatter blueberries in the center. You can also keep the top simple and rustic. Both styles work well for this berry icebox cake.
Final Step: Chill until set
Cover the dish loosely with plastic wrap and chill it in the refrigerator for at least 4 to 6 hours. For the best texture, chill overnight. The graham crackers need time to soften so the dessert slices like a cake instead of a layered pudding.
When ready to serve, lift the dessert out if you lined the pan, or cut straight from the dish into neat squares. Serve cold for the best flavor and texture. Each bite should be creamy, fruity, and soft with just a little graham cracker texture left.
For the cleanest slices, let the easy no bake icebox cake sit in the fridge overnight before serving.

Dietary Substitutions to Customize Your Icebox Cake
Protein and Main Component Alternatives
Since this is a chilled dessert rather than a savory meal, the main swaps focus on the cream, crackers, and fruit. If you want a dairy-free version, use coconut whipped cream or another plant-based whipped topping. This keeps the dessert fluffy while still fitting a vegan eating style.
For a gluten-free icebox cake, swap the graham crackers for certified gluten-free graham-style crackers. Gluten-free vanilla wafers or crisp shortbread-style cookies can also work if they are sturdy enough to soften during chilling. Just avoid cookies that are too thick, because they may stay too firm.
Vegetable, Sauce, and Seasoning Modifications
This dessert does not use vegetables, but the fruit and flavorings can be changed in many ways. Try raspberries, blackberries, or thin banana slices if you want a different fruit mix. If strawberries are very sweet, use a little less sugar in the cream. If your berries are tart, keep the full amount of confectioners’ sugar for balance.
You can also change the flavor profile by adjusting the extracts. Keep the vanilla for a classic taste, or skip the almond extract if you prefer a softer flavor. For a lighter version, use less whipped cream between layers and add more berries. These changes still keep the dessert in the no bake dessert family while making it fit your needs.
Mastering Icebox Cake: Advanced Tips and Variations
Pro cooking techniques
For the best icebox cake, start with very cold cream and a cold bowl. This helps the cream whip faster and hold a better shape. Spread each layer all the way to the edges so the crackers soften evenly. If you leave gaps, the dessert may settle unevenly.
Another helpful trick is to let the fruit dry completely after washing. Extra water can make the layers loose. If you want stronger berry flavor, lightly mash a few strawberries and spoon them between layers, but keep the amount small so the dessert does not get watery.
Flavor variations
This easy no bake icebox cake also works with flavor changes. You can add a little lemon zest to the whipped cream for a brighter taste. A few sliced bananas can give the dessert a more classic banana-cream feel. For a richer version, drizzle a small amount of berry sauce between layers.
If you like mixed fruit desserts, use strawberries with blueberries one time and raspberries another time. You can also make a striped pattern with fruit for a pretty party dessert. That makes the berry icebox cake feel fresh and new each time.
Presentation tips
Use a clear dish if you want the layers to show. The stripes of cream, crackers, and berries look very pretty in a glass pan. Top with extra berries right before serving for a fresh look. A light dusting of powdered sugar can also add a simple finishing touch.
For a party, cut the cake into neat squares and place each piece on a dessert plate with a few berries around it. If you are serving guests, keep the pan chilled until the last minute so the slices stay firm.
Make-ahead options
This dessert is one of the best choices when you need something prepared ahead of time. You can assemble the entire berry icebox cake no bake recipe the night before and let it chill until the next day. In fact, the texture is even better after a full night in the fridge.
If you need to plan farther ahead, make it up to 2 days early and keep it covered. Add the garnish just before serving so the berries stay bright and fresh. For busy hosts, this is a real time-saver.
For another easy make-ahead idea, try this blueberry muffin bread recipe from Maestro Recipe, which also brings cozy berry flavor to your table.
How to Store Icebox Cake: Best Practices
Proper storage helps this no bake cake stay creamy and delicious. Because it contains whipped cream and fresh fruit, it should always be kept cold. The good news is that this dessert holds up well in the fridge, making it ideal for leftovers and planning ahead.
Refrigeration
Store the cake covered in the refrigerator for up to 3 days. Keep it in the same dish or transfer slices to an airtight container. The texture will be soft and cake-like, but it is best on the first and second day. If the fruit releases a little juice, just gently blot the top before serving.
Freezing
You can freeze an assembled icebox cake for up to 1 month. Wrap it tightly in plastic wrap, then add a layer of foil or place it in a freezer-safe container. Thaw it in the fridge overnight before serving. Do not thaw it at room temperature, since the cream can become too soft.
Reheating
This dessert should not be reheated. It is meant to be served cold. If it has been in the freezer, the best method is slow thawing in the refrigerator. Serving it chilled keeps the texture smooth and refreshing.
Meal prep considerations
If you are making this for a party, assemble it one day ahead and garnish right before serving. This keeps the berries fresh and the top layer pretty. It also makes the dessert a great option for busy schedules, potlucks, and holiday tables.
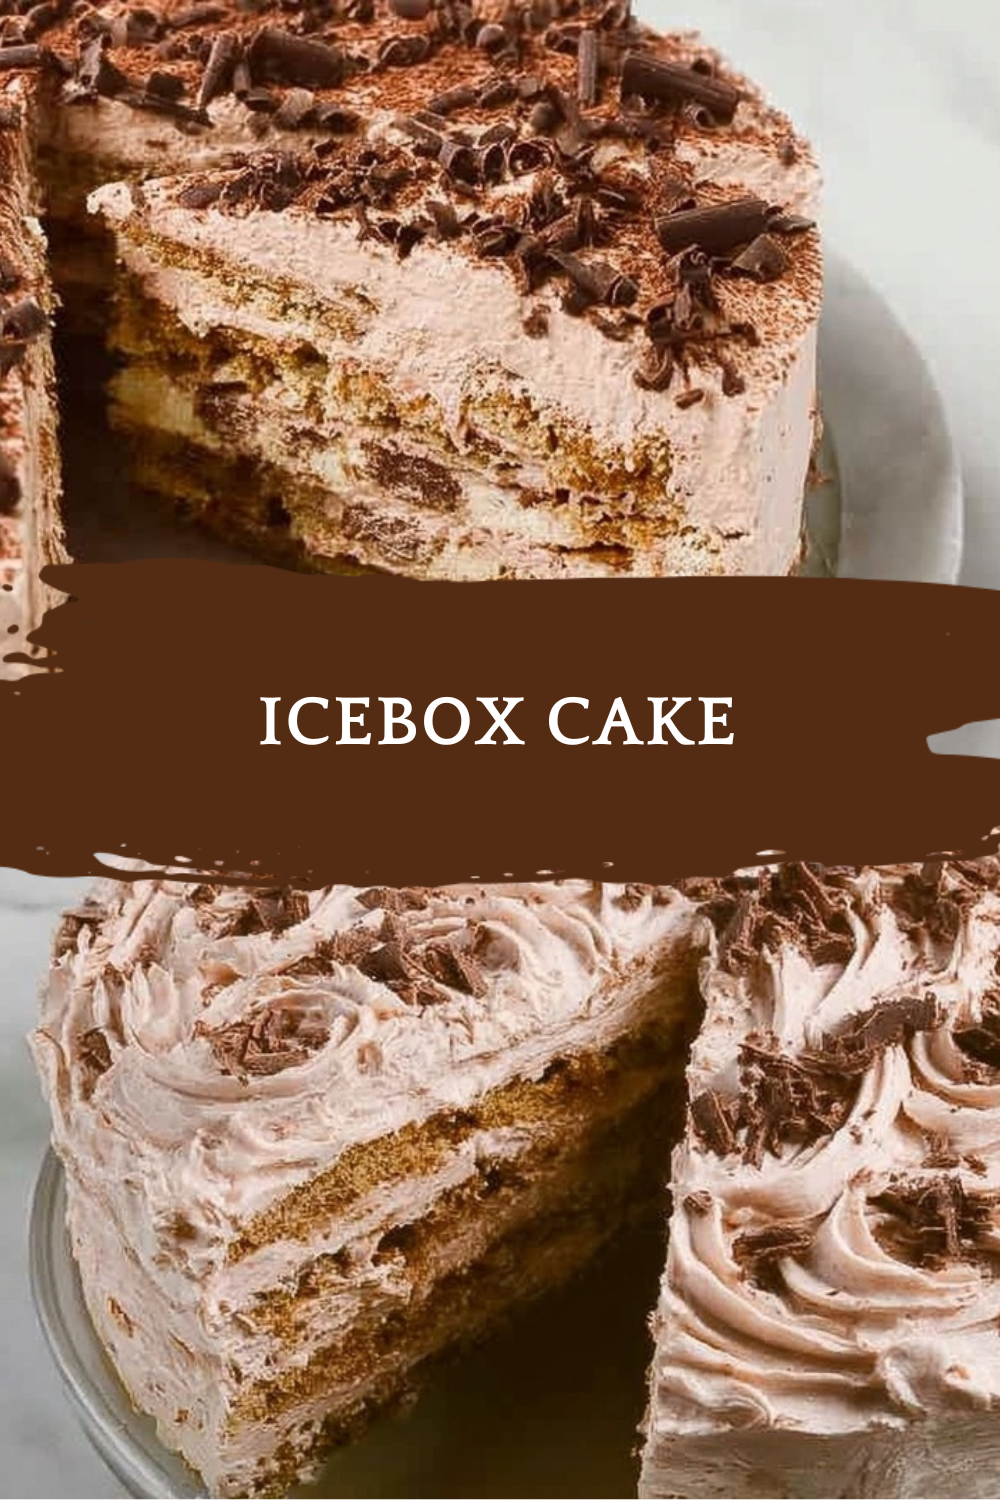
FAQs: Frequently Asked Questions About Icebox Cake
What is icebox cake?
Icebox cake is a simple no-bake dessert made by layering thin cookies or graham crackers with sweetened whipped cream, then chilling it in the fridge until the cookies soften into a cake-like texture. Originating in the early 20th century before modern refrigerators, it relies on refrigeration (the “icebox”) to set. Classic versions use chocolate wafers and cream, but you can add fruits like strawberries or bananas for flavor. To make one, whip heavy cream with sugar and vanilla until stiff peaks form. Alternate layers of cream and cookies in an 8×8 dish or loaf pan, starting and ending with cream. Chill for at least 4-6 hours, ideally overnight. Slice and serve cold—it’s creamy, crunchy at first, then melts into tender cake. Perfect for summer or beginners, with endless variations like peanut butter or lemon. (98 words)
Can I use frozen berries in icebox cake?
No, avoid frozen berries in icebox cake as they release excess liquid during thawing and chilling, making the dessert soggy and watery instead of creamy. Even patted dry, they hold too much moisture compared to fresh berries. Stick to fresh strawberries, raspberries, or blueberries—wash, dry thoroughly, and slice thinly for even layering. For best results, macerate fresh berries lightly in sugar for 15-30 minutes to draw out juices without over-wetting; drain excess before assembling. This keeps layers firm and flavors balanced. If berries are out of season, opt for jam or preserves spread sparingly between layers, or try banana slices or chocolate for moisture control. Fresh always yields the ideal texture after 6+ hours of chilling. (112 words)
How long does icebox cake need to chill?
Icebox cake needs at least 4-6 hours to chill, but overnight (8-12 hours) is best for cookies to fully soften into cake texture. Rush it, and layers stay crunchy; wait longer for cream to meld flavors. Cover loosely with plastic wrap to prevent drying out. In hot weather, chill up to 24 hours. Test doneness by pressing the top—if it feels firm and a toothpick pulls out moist cookie bits, it’s ready. Pro tip: assemble in the evening for morning slicing. Freezes well too—wrap tightly and freeze up to 1 month; thaw in fridge overnight. Serve straight from fridge for clean cuts. Patience ensures perfect results every time. (104 words)
Can I make icebox cake ahead of time?
Yes, icebox cake is ideal for making ahead—it tastes better after flavors meld. Assemble up to 2 days in advance; store covered in the fridge. The extra chill time softens cookies perfectly without sogginess if ingredients are fresh. For longer, freeze assembled cake up to 1 month: wrap in plastic then foil, thaw in fridge 8-12 hours before serving. Avoid refreezing. Prep whipped cream and slice fruits day-of if possible, but full assembly holds well. Great for parties—make 48 hours early, garnish with fresh berries or chocolate shavings right before guests arrive. Keeps texture creamy and stable. (92 words)
What cookies work best for icebox cake?
Thin chocolate wafer cookies are classic for icebox cake, absorbing cream evenly without crumbling. Graham crackers offer a honeyed crunch—use full sheets or honey variety. Shortbread or ladyfingers work for lighter versions; avoid thick Oreos as they stay too firm. Choose crisp, plain cookies about 2-3 inches wide. Break extras to fit edges. For gluten-free, try GF chocolate snaps or graham-style crackers. Layer 20-30 cookies total in an 8-inch pan. Dip briefly in milk for faster softening if desired, but not necessary. Quality matters—stale cookies lead to poor texture. Source from brands like Nabisco Famous Wafers for authenticity. (98 words)
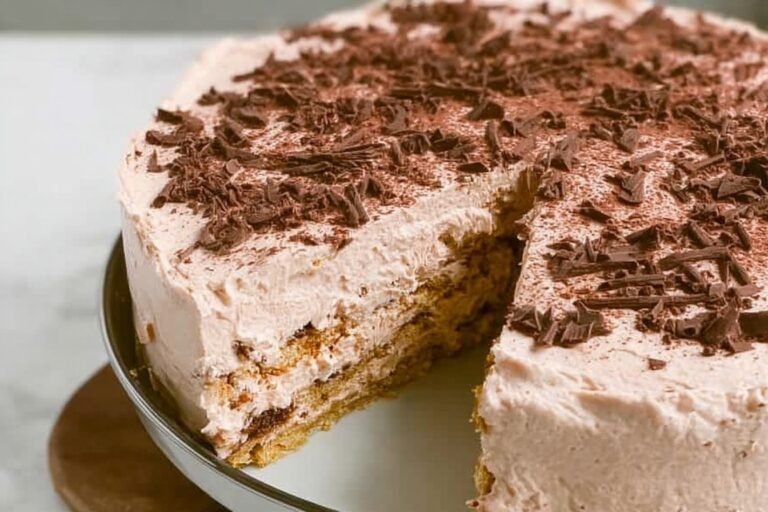
Icebox Cake
🍓 Indulge in no-bake perfection: layers of whipped cream, fresh strawberries & blueberries over graham crackers that transform into cake!
🧊 Make-ahead crowd-pleaser chills in 3 hours, light yet decadent summer dessert with natural berry freshness.
- Total Time: 3 hours 15 minutes
- Yield: 12 servings
Ingredients
– 3 cups cold heavy cream or heavy whipping cream
– 1/3 cup confectioners’ sugar
– 2 teaspoons pure vanilla extract or vanilla bean paste
– 1/2 teaspoon pure almond extract
– 20 to 21 full-sheet graham crackers
– 2 cups sliced fresh strawberries
– 1 cup fresh blueberries
– Optional additional berries for garnish
Instructions
1-First Step: Prep your ingredients Gather all of your ingredients before you begin. Wash the strawberries and blueberries, then pat them dry with a clean towel. Slice the strawberries so they are ready for layering. If you want a neat finish, line an 8×8 inch baking dish with parchment paper, leaving a little overhang on the sides for lifting later. Cold ingredients matter here. Keep the heavy cream in the refrigerator until you are ready to whip it. A chilled bowl and whisk also help the cream thicken faster. This small step makes the process smoother and gives the dessert a lighter texture.
2-Second Step: Make the whipped cream Pour the 3 cups of cold heavy cream into a large mixing bowl. Add the 1/3 cup confectioners’ sugar, 2 teaspoons pure vanilla extract or vanilla bean paste, and 1/2 teaspoon pure almond extract. Beat the mixture with a hand mixer or stand mixer on medium-high speed until stiff peaks form. Stiff peaks mean the cream holds its shape when you lift the beaters. Be careful not to overmix, or the cream can turn grainy. You want it fluffy, smooth, and easy to spread. This sweetened cream is the heart of your icebox cake recipe.
3-Third Step: Build the first layer Spread a thin layer of whipped cream on the bottom of your dish. This helps the graham crackers stay in place. Add a full layer of graham crackers on top, breaking a few pieces as needed so the entire bottom is covered. Next, spread more whipped cream over the crackers. Add a layer of sliced strawberries and blueberries on top of the cream. Try to spread the fruit evenly so every slice gets some berry flavor. This is what gives the dessert its bright, fresh taste and makes it a true easy berry icebox cake.
4-Fourth Step: Continue layering Repeat the layers until all ingredients are used, finishing with whipped cream on top. In most cases, you will get several layers of crackers, cream, and berries in your dish. Press gently as you go, but do not push too hard. The layers should stay even and soft. If you like a more fruit-forward dessert, add a little extra strawberries and blueberries between each layer. If you want a more classic texture, use a lighter amount of fruit and let the graham crackers shine. Either way, the dessert will still taste wonderful after chilling.
5-Fifth Step: Smooth the top and garnish Use a spatula to smooth the top layer of whipped cream. Then add the optional additional berries for garnish. This little touch makes the cake look fresh and ready for a party table, family dinner, or weekend treat. If you want a more polished look, place a few strawberry slices around the edges and scatter blueberries in the center. You can also keep the top simple and rustic. Both styles work well for this berry icebox cake.
6-Final Step: Chill until set Cover the dish loosely with plastic wrap and chill it in the refrigerator for at least 4 to 6 hours. For the best texture, chill overnight. The graham crackers need time to soften so the dessert slices like a cake instead of a layered pudding. When ready to serve, lift the dessert out if you lined the pan, or cut straight from the dish into neat squares. Serve cold for the best flavor and texture. Each bite should be creamy, fruity, and soft with just a little graham cracker texture left.
Last Step:
Please leave a rating and comment letting us know how you liked this recipe! This helps our business to thrive and continue providing free, high-quality recipes for you.Notes
❄️ Start with ice-cold cream and tools for stable whipped peaks.
🍓 Fresh berries only – frozen release excess water, making cake soggy.
💎 Chill overnight for graham crackers to fully soften into cake texture.
- Prep Time: 15 minutes
- Chilling: 3 hours
- Category: Dessert
- Method: No Bake
- Cuisine: American
- Diet: Vegetarian
Nutrition
- Serving Size: 1 slice
- Calories: 350 kcal
- Sugar: 20 g
- Sodium: 150 mg
- Fat: 25 g
- Saturated Fat: 15 g
- Unsaturated Fat: 10 g
- Trans Fat: 0 g
- Carbohydrates: 28 g
- Fiber: 2 g
- Protein: 3 g
- Cholesterol: 80 mg