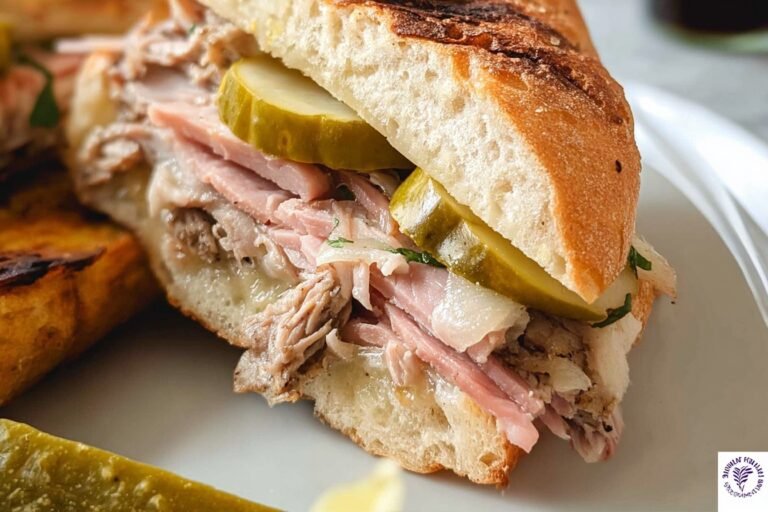
Ingredients
– 1 loaf or 1 piece cut into 8 to 12 inch lengths Cuban bread for creating the proper crusty exterior and soft interior
– Light amount, for brushing butter or olive oil for helping the bread crisp during pressing
– To taste yellow mustard for adding tang and balancing the richness of the meats
– To taste, sometimes marinated ham for providing salty, savory depth
– To taste roast pork for giving the sandwich its main roast flavor
– To taste Swiss cheese for melting into the layers and adding mild richness
– To taste dill pickles for bringing acidity and crunch
– To taste, Tampa style only salami for adding a deeper cured meat flavor
Instructions
1-First Step: Prepare the bread and fillings Start by gathering all ingredients before assembly. Cuban Sandwiches come together best when everything is ready at the same time, since the bread should be pressed while the fillings are still cool and organized. Slice the Cuban bread in half horizontally, then cut it into 8 to 12 inch lengths if needed. Lightly butter the outside of the bread or brush it with olive oil. This gives the crust a golden finish during pressing. Set out the ham, roast pork, Swiss cheese, pickles, mustard, and salami if you are making the Tampa-style version.
2-Second Step: Spread the mustard Spread yellow mustard on both cut sides of the bread. Use enough to flavor the sandwich, but not so much that it runs out during pressing. The mustard should cover the surface in a thin, even layer. This step matters because it gives the sandwich its bright, sharp contrast against the rich meats and cheese. Traditional Cuban Sandwiches keep the filling balanced, so the mustard should support the flavor rather than dominate it.
3-Third Step: Build the layers Begin with a layer of ham, then add roast pork, Swiss cheese, and pickles. If you are making a Tampa version, add salami with the meats. The order matters because the cheese helps bind the layers once it melts. Keep the fillings even so the sandwich presses flat and cooks uniformly. For South Florida style, leave out the salami. For traditional versions, avoid lettuce, tomatoes, and mayonnaise, since those ingredients change the texture and move the sandwich away from its classic form. Key West variations may include those additions, but they are not part of the standard Cuban Sandwiches many diners expect.
4-Fourth Step: Close and press the sandwich Place the top half of the bread over the filling and press gently with your hands to help the sandwich hold together. Transfer it to a plancha or panini press. If you do not have a press, a heavy skillet or a foil-wrapped brick can help create the needed compression. Heat the sandwich over medium heat until the bread becomes crisp and the cheese melts fully. Pressing is what turns the assembled ingredients into the familiar compact shape. A plancha gives even pressure across the entire surface, which helps the crust brown well and the fillings warm through.
5-Fifth Step: Cook until crisp and melted Cook the sandwich until the exterior is golden and crisp. This usually takes only a few minutes per side in a hot press, though timing depends on the thickness of the bread and fillings. The goal is a firm outside with a warm, melted inside. If the bread browns too quickly, reduce the heat so the cheese has time to melt before the crust burns. When the sandwich is ready, lift it carefully from the press and let it rest for a moment. This brief pause keeps the layers from sliding apart when you cut it. A proper Cuban Sandwiches result should feel tight, hot, and lightly compressed.
6-Final Step: Slice and serve Cut the sandwich into diagonal halves for serving. The diagonal cut gives a cleaner presentation and makes the layers easier to see. Serve immediately while the bread is crisp and the cheese is still soft. Cuban Sandwiches are best eaten hot, when the contrast between the crunchy crust and the juicy filling is at its peak. If you are serving a crowd, prepare multiple sandwiches in batches and keep the finished ones warm in a low oven for a short time. Avoid holding them too long, since the bread can lose its crisp texture.
Last Step:
Please leave a rating and comment letting us know how you liked this recipe! This helps our business to thrive and continue providing free, high-quality recipes for you.Notes
🔥 Press firmly and evenly for that signature ultra-crispy crust.
🧀 Opt for high-quality Swiss for perfect melty pull.
🍖 Use homemade mojo-marinated pork for authentic Miami flavor boost.
- Prep Time: 10 minutes
- Cook Time: 10 minutes
- Category: Sandwiches
- Method: Panini Press
- Cuisine: Cuban
Nutrition
- Serving Size: 1 sandwich
- Calories: 700 kcal
- Sugar: 4g
- Sodium: 1800mg
- Fat: 35g
- Saturated Fat: 12g
- Unsaturated Fat: 20g
- Trans Fat: 0g
- Carbohydrates: 60g
- Fiber: 3g
- Protein: 40g
- Cholesterol: 120mg