Why You’ll Love This Lemon Curd
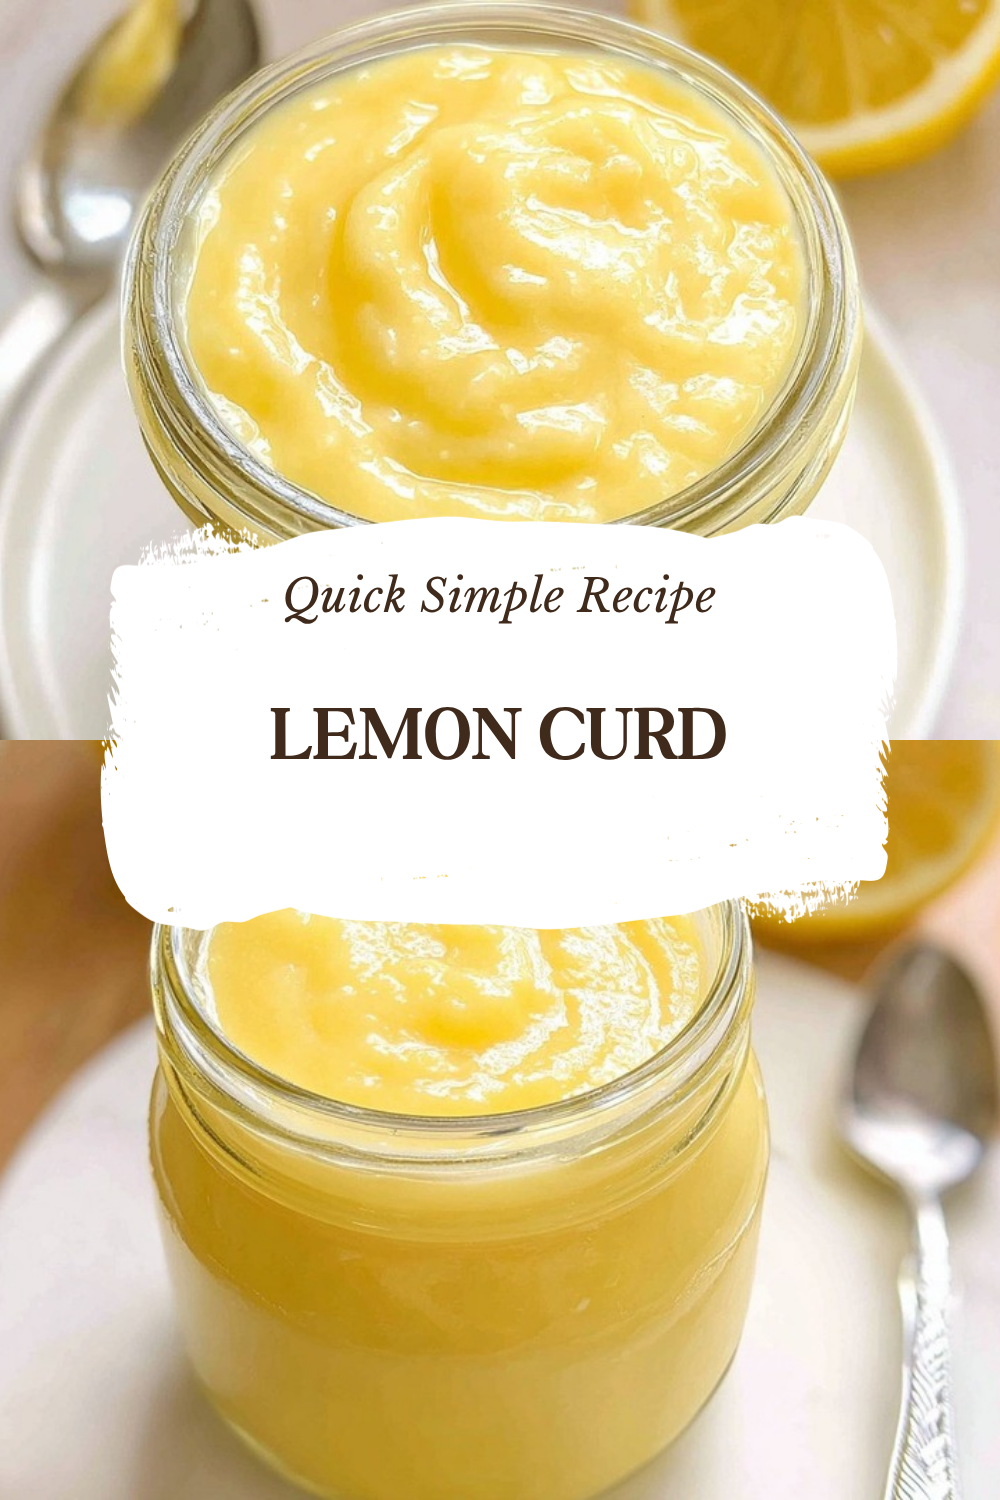
This Lemon Curd recipe is one of those happy little kitchen wins that feels fancy without acting fancy. It is bright, silky, and ready in a flash, which makes it a favorite for busy mornings, weekend baking, and last-minute dessert plans. If you love lemon flavor that tastes fresh and lively, this homemade version is about to become a regular in your fridge.
- Easy to make: You only need a few basic ingredients, one bowl, and about 10 minutes of cooking time. Since the curd thickens as it cooks, you get a smooth result without a lot of fuss.
- Fresh and satisfying: Lemon curd brings a sunny citrus flavor that feels rich but still bright. It uses fresh lemon juice and zest, so the taste is far better than store-bought versions made with bottled juice.
- Very versatile: Spoon it over toast, swirl it into yogurt, fill cakes and tarts, or use it as a topping for pancakes. It also works well with different citrus fruits if you want to play around with flavor.
- Great for all kinds of eaters: This recipe is naturally gluten-free, and you can adjust the texture if you want a thicker curd by swapping in 1 whole egg for 2 egg yolks. That makes it handy for different baking needs.
Fresh lemons make all the difference here. If you want that bold, clean citrus pop, skip the bottled juice and go straight for the real thing.
For more on the bright side of lemons, take a look at this guide to the benefits of lemons. You can also pair this sweet citrus spread with brunch favorites like baked French toast or homemade cinnamon rolls.
Jump to:
- Why You’ll Love This Lemon Curd
- Essential Ingredients for Lemon Curd
- Special dietary options
- How to Prepare the Perfect Lemon Curd: Step-by-Step Guide
- First step: Set up your double boiler
- Second step: Combine the base ingredients
- Third step: Cook slowly while whisking
- Fourth step: Add the butter
- Fifth step: Strain if needed
- Final step: Chill and serve
- Ingredients List
- Dietary Substitutions to Customize Your Lemon Curd
- Protein and main component alternatives
- Vegetable, sauce, and seasoning modifications
- Mastering Lemon Curd: Advanced Tips and Variations
- Pro cooking techniques
- Flavor variations
- Presentation tips
- Make-ahead options
- How to Store Lemon Curd: Best Practices
- Refrigeration
- Freezing
- Reheating
- Meal prep considerations
- FAQs: Frequently Asked Questions About Lemon Curd
- What is lemon curd and what does it taste like?
- How do I make lemon curd at home?
- How long does homemade lemon curd last in the fridge?
- Can I make lemon curd with other citrus fruits?
- What are common mistakes when making lemon curd and how to fix them?
- Lemon Curd
- Ingredients
- Instructions
- Last Step:
- Notes
- Nutrition
- Did you make this recipe?
Essential Ingredients for Lemon Curd
Here is the full ingredient list for this Lemon Curd recipe. Each item matters, so keep the measurements close for the best texture and flavor.
- 4 large egg yolks – These give the curd its creamy, custard-like body and help it thicken properly.
- 2/3 cup granulated sugar – Sweetens the curd and balances the tart lemon juice.
- 1 tablespoon lemon zest from about 1 lemon – Adds bold citrus aroma and deeper lemon flavor.
- 1/3 cup fresh lemon juice from about 2 to 3 lemons – Brings the signature tang and bright flavor.
- 1/8 teaspoon salt – Sharpens the flavor and keeps the sweetness from feeling flat.
- 6 tablespoons unsalted butter, softened and cut into 6 pieces – Makes the curd smooth, glossy, and rich.
For thicker lemon curd: replace 2 egg yolks with 1 whole egg. That little swap gives the mixture a firmer set without changing the flavor much.
Special dietary options
- Vegan: Use plant-based butter and try a vegan lemon curd made with cornstarch and unsweetened plant milk instead of eggs.
- Gluten-free: This recipe is naturally gluten-free as written.
- Low-calorie: Reduce the sugar slightly, then taste and adjust as needed. You can also use the curd more sparingly as a topping.
How to Prepare the Perfect Lemon Curd: Step-by-Step Guide
Making Lemon Curd at home is easier than many people think. The main trick is gentle heat, steady whisking, and a little patience while the mixture turns from thin and shiny into thick and silky. The whole process is quick, but the texture depends on staying alert at the stove.
First step: Set up your double boiler
Fill the bottom of a double boiler with 1 to 2 inches of water and bring it to a simmer over low heat. If you do not have a double boiler, use a heatproof glass bowl set over a pot of simmering water. This gentle setup helps prevent the eggs from scrambling and keeps the curd smooth.
Use non-metal tools when possible, because metal can sometimes give the curd a slight metallic taste. A whisk and a heatproof spatula are your best friends here.
Second step: Combine the base ingredients
In the top pot or bowl, add the egg yolks, sugar, lemon zest, lemon juice, and salt. Whisk everything together until well mixed. The mixture will look thin at first, and that is completely normal.
This is where fresh lemon juice really matters. Bottled juice can taste dull or bitter, while fresh lemons give you that sharp, sunny flavor people expect from homemade curd.
Third step: Cook slowly while whisking
Place the bowl over the simmering water and whisk constantly. Keep the heat low and steady so the eggs cook gently. After about 10 minutes, the mixture should thicken to a texture similar to hollandaise sauce.
You are looking for a curd that coats the back of a spoon. If you use a thermometer, aim for 170 degrees Fahrenheit. That is the sweet spot where the eggs are cooked enough to thicken the curd but not so much that they turn grainy.
If you want to serve this with other brunch dishes, it pairs nicely with recipes like eggs benedict or even a simple breakfast spread with fresh fruit.
Fourth step: Add the butter
Once the curd has thickened, remove it from the heat. Add the butter pieces and whisk until fully melted and smooth. The butter gives the curd its glossy finish and richer taste, so do not rush this part.
If the mixture looks a little separated at first, keep whisking. It usually comes together quickly once the butter melts in completely.
Fifth step: Strain if needed
If you want an extra smooth curd, pour it through a fine-mesh sieve into a clean bowl or jar. This step catches any tiny bits of cooked egg or zest. It is optional, but it gives the curd that polished bakery-style texture.
Some home cooks skip straining because they like the zest flecks. Either way works, so follow your own texture preference.
Final step: Chill and serve
Pour the curd into a jar or bowl and cover it with plastic wrap directly on the surface. This keeps a skin from forming while it cools. Refrigerate until thickened further.
The prep time is about 5 minutes, the cook time is about 10 minutes, and the total time is about 1 hour and 15 minutes including cooling. Once chilled, it is ready for toast, cake layers, tart shells, or a spoon straight from the fridge, no judgment here.
Ingredients List
- 4 large egg yolks
- 2/3 cup granulated sugar
- 1 tablespoon lemon zest, from about 1 lemon
- 1/3 cup fresh lemon juice, from about 2 to 3 lemons
- 1/8 teaspoon salt
- 6 tablespoons unsalted butter, softened and cut into 6 pieces
Optional thicker version: Replace 2 egg yolks with 1 whole egg.

Dietary Substitutions to Customize Your Lemon Curd
Protein and main component alternatives
If you need to adjust this Lemon Curd recipe, there are a few smart swaps that still keep the spirit of the dish intact. For a thicker curd, the recipe already gives you a helpful option: replace 2 egg yolks with 1 whole egg. That creates a firmer texture, which is useful for tart filling or layered desserts.
For a plant-based version, replace the butter with vegan butter and use a cornstarch-thickened citrus mixture instead of egg yolks. The texture will be a little different, but the bright citrus flavor still shines. If you are following a lower-cholesterol approach, you can also use fewer yolks and lean on a whole egg for structure.
Vegetable, sauce, and seasoning modifications
This recipe is more about citrus than vegetables, but flavor swaps are where things get fun. You can replace the lemon juice with lime, orange, grapefruit, pineapple, or cranberry juice for a fresh twist. Each one changes the personality of the curd a bit.
- Lime: sharper and more tropical
- Orange: milder and sweeter
- Grapefruit: slightly bitter and bold
- Pineapple: sunny and sweet
- Cranberry: tart and festive
Whatever citrus you choose, keep the cooking method gentle and whisk often so the curd stays smooth.
Mastering Lemon Curd: Advanced Tips and Variations
Once you have made Lemon Curd a few times, the little details start to matter. A good batch can go from nice to downright dreamy with a few simple habits.
Pro cooking techniques
Use a double boiler or a heatproof glass bowl over simmering water to keep the heat gentle. Avoid metal double boilers if possible, since they can leave a metallic taste. Stick with non-metal tools like silicone spatulas or wooden spoons when stirring near the end.
If the curd is not thickening, raise the heat slightly while whisking more vigorously. The mixture should thicken to a hollandaise-like texture and reach 170 degrees Fahrenheit. A thermometer can be very handy here, especially if you are still building confidence in the kitchen.
Flavor variations
Once you master the base recipe, try swapping the citrus. Lime curd is fantastic in tart shells. Orange curd works well in cake layers. Grapefruit adds a grown-up edge, while cranberry curd feels perfect for holiday baking.
You can also mix the curd into fillings for macarons, spoon it over cheesecake, or use it as a bright layer in parfaits. It is one of those recipes that quietly sneaks into everything.
Presentation tips
Serve lemon curd in a small bowl with fresh berries, shortbread cookies, or warm scones. For desserts, spoon it into tart shells or pipe it between cake layers. A little zest on top makes it look fresh and pretty without much effort.
It also pairs beautifully with breakfast boards and brunch spreads. If you like build-your-own plates, check out this breakfast charcuterie board idea for a fun serving match.
Make-ahead options
Lemon curd is a smart make-ahead recipe because it keeps well in the fridge and freezer. Make a batch when you have fresh lemons on hand, then use it during the week for quick desserts, easy breakfasts, or party treats. Busy parents, students, and working professionals will probably love that part most.
How to Store Lemon Curd: Best Practices
Proper storage helps your Lemon Curd stay smooth, tasty, and safe to eat. Since it contains eggs and butter, it needs a little fridge care.
Refrigeration
Store lemon curd in a jar or airtight container in the refrigerator for up to 10 days. Some batches can last up to 2 weeks if handled carefully, but the safest and freshest flavor usually comes within the first week. Keep it below 40 degrees Fahrenheit and always use a clean spoon.
Freezing
If you want to keep it longer, freeze lemon curd for 3 to 6 months. Use freezer-safe containers and leave a little room at the top because it may expand slightly. Thaw it overnight in the fridge before using.
Reheating
Lemon curd is usually served cold or at room temperature, but if it becomes too firm after chilling, let it sit on the counter for a few minutes. If you need to loosen it for spreading, warm it gently in short bursts while stirring. Do not overheat it, or the texture may break.
Meal prep considerations
For easy meal prep, portion the curd into smaller containers or even ice cube trays. That makes it simple to thaw only what you need for a tart, toast, or cake filling. It is a small trick, but it saves time later.
Homemade lemon curd keeps life interesting. One spoonful can turn plain toast into something that feels like a little weekend treat.
FAQs: Frequently Asked Questions About Lemon Curd
What is lemon curd and what does it taste like?
Lemon curd is a smooth, creamy spread made from fresh lemon juice, zest, sugar, eggs, and butter. It has a bright, tangy flavor balanced by sweetness, with a velvety texture that’s richer than lemon pie filling. The taste is intensely citrusy—think zesty lemon with a subtle buttery undertone—making it perfect for tarts, cakes, or toast. Unlike jam, it’s custard-like due to the eggs, which give it a luxurious mouthfeel. One batch yields about 2 cups and takes 15-20 minutes to cook on the stovetop. Store it in the fridge for up to 2 weeks. It’s versatile for both sweet and savory dishes, like glazing chicken or filling macarons. Fresh lemons make the best flavor—avoid bottled juice for authenticity.
How do I make lemon curd at home?
To make lemon curd, whisk together 3/4 cup sugar, 3 large eggs, 1/2 cup fresh lemon juice, and 1 tablespoon lemon zest in a saucepan. Cook over medium-low heat, stirring constantly with a whisk, until it thickens to coat the back of a spoon (about 8-10 minutes; reaches 170°F). Remove from heat, stir in 1/2 cup cold butter cut into pieces until melted and smooth. Strain through a fine-mesh sieve to remove bits, then pour into jars. Cool to room temperature before refrigerating. This yields 2 cups. Use room-temperature eggs to prevent curdling, and a heavy-bottomed pan for even heat. Double boiler method works too for gentler cooking. It’s ready when it holds its shape but isn’t boiling.
How long does homemade lemon curd last in the fridge?
Homemade lemon curd lasts 1-2 weeks in the fridge when stored in an airtight container or jar. The eggs and butter make it perishable, so keep it below 40°F. For longer storage, freeze it in freezer-safe bags or containers for up to 3 months—thaw overnight in the fridge. Signs it’s gone bad: mold, off smell, or separation. Always use clean utensils to avoid contamination. If canning, process in a water bath for 15 minutes for shelf-stable jars up to a year (follow USDA guidelines). Pro tip: portion into ice cube trays for easy use in recipes. At room temperature, it lasts 1-2 hours max. Consume within a week for peak flavor and safety.
Can I make lemon curd with other citrus fruits?
Yes, swap lemons for limes, oranges, grapefruits, or even pineapple juice using the same recipe ratios. For limes, expect a tart, tropical twist—use 1/2 cup juice from 4-5 limes. Oranges add milder sweetness; reduce sugar by 2 tablespoons. Grapefruit brings a bitter edge, perfect for tarts—zest from 1 large fruit. Pineapple curd works great for layer cakes; simmer 1/2 cup juice first to concentrate flavors. Cranberry version: blend 1 cup cooked cranberries with lemon juice. Adjust cooking time slightly for denser juices. Always strain for smoothness. These variations keep the 15-minute stovetop method intact, yielding 2 cups each. Test thickness and taste before chilling.
What are common mistakes when making lemon curd and how to fix them?
Common issues: curdling from high heat—cook low and slow, stirring constantly, never boil. Fix by straining and blending smooth. Too thin? Cook longer to 175°F or add 1 teaspoon cornstarch slurry. Grainy texture from overcooked eggs—use fresh, room-temp eggs and strain well. Separated butter? Stir vigorously off-heat. Bitter taste? Balance with more sugar or less zest. Lumps? Whisk thoroughly before heating. Microwave method risks uneven cooking—stick to stovetop. If it scrambles slightly, salvage by food processor. Prevention: thermometer for precision, heavy pan for steady heat. Perfect curd nappes a spoon and sets firm when chilled. Practice makes it foolproof in under 20 minutes.
Lemon Curd
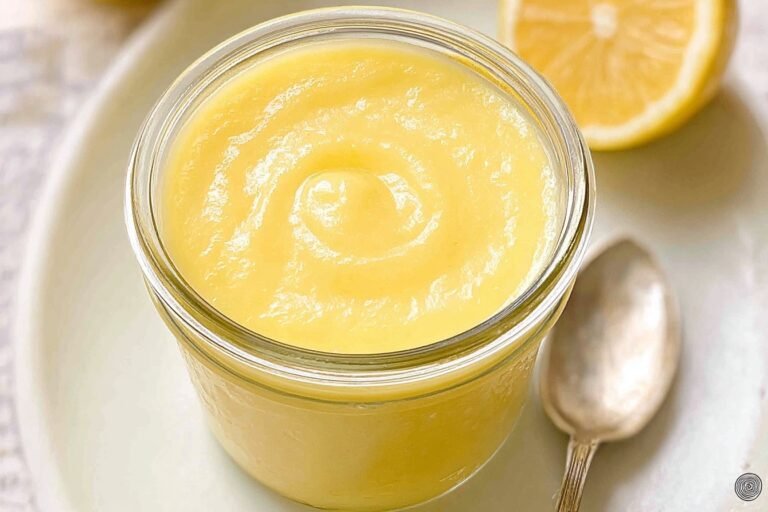
🍋 Whip up silky, vibrant lemon curd bursting with fresh citrus tang – versatile for fillings, spreads, or straight from the jar!
🥄 Foolproof homemade guide delivers glossy perfection effortlessly – elevate scones, tarts, or yogurt for sunny indulgence anytime.
- Total Time: 1 hour 15 minutes
- Yield: 1 1/2 cups (12 servings)
Ingredients
– 4 large egg yolks
– 2/3 cup granulated sugar
– 1 tablespoon lemon zest from about 1 lemon
– 1/3 cup fresh lemon juice from about 2 to 3 lemons
– 1/8 teaspoon salt
– 6 tablespoons unsalted butter, softened and cut into 6 pieces
Instructions
1-First step: Set up your double boiler Fill the bottom of a double boiler with 1 to 2 inches of water and bring it to a simmer over low heat. If you do not have a double boiler, use a heatproof glass bowl set over a pot of simmering water. This gentle setup helps prevent the eggs from scrambling and keeps the curd smooth. Use non-metal tools when possible, because metal can sometimes give the curd a slight metallic taste. A whisk and a heatproof spatula are your best friends here.
2-Second step: Combine the base ingredients In the top pot or bowl, add the egg yolks, sugar, lemon zest, lemon juice, and salt. Whisk everything together until well mixed. The mixture will look thin at first, and that is completely normal. This is where fresh lemon juice really matters. Bottled juice can taste dull or bitter, while fresh lemons give you that sharp, sunny flavor people expect from homemade curd.
3-Third step: Cook slowly while whisking Place the bowl over the simmering water and whisk constantly. Keep the heat low and steady so the eggs cook gently. After about 10 minutes, the mixture should thicken to a texture similar to hollandaise sauce. You are looking for a curd that coats the back of a spoon. If you use a thermometer, aim for 170 degrees Fahrenheit. That is the sweet spot where the eggs are cooked enough to thicken the curd but not so much that they turn grainy. If you want to serve this with other brunch dishes, it pairs nicely with recipes like eggs benedict or even a simple breakfast spread with fresh fruit.
4-Fourth step: Add the butter Once the curd has thickened, remove it from the heat. Add the butter pieces and whisk until fully melted and smooth. The butter gives the curd its glossy finish and richer taste, so do not rush this part. If the mixture looks a little separated at first, keep whisking. It usually comes together quickly once the butter melts in completely.
5-Fifth step: Strain if needed If you want an extra smooth curd, pour it through a fine-mesh sieve into a clean bowl or jar. This step catches any tiny bits of cooked egg or zest. It is optional, but it gives the curd that polished bakery-style texture. Some home cooks skip straining because they like the zest flecks. Either way works, so follow your own texture preference.
6-Final step: Chill and serve Pour the curd into a jar or bowl and cover it with plastic wrap directly on the surface. This keeps a skin from forming while it cools. Refrigerate until thickened further. The prep time is about 5 minutes, the cook time is about 10 minutes, and the total time is about 1 hour and 15 minutes including cooling. Once chilled, it is ready for toast, cake layers, tart shells, or a spoon straight from the fridge, no judgment here.
Last Step:
Please leave a rating and comment letting us know how you liked this recipe! This helps our business to thrive and continue providing free, high-quality recipes for you.Notes
🔥 Use a double boiler or glass bowl over simmering water to gently cook without curdling.
🍋 Always use fresh lemons for zest and juice – bottled lacks the bright flavor.
🧊 Store in fridge up to 10 days or freeze for months; thaw overnight before use.
- Prep Time: 5 minutes
- Chilling Time: 1 hour
- Cook Time: 10 minutes
- Category: Desserts
- Method: Stovetop
- Cuisine: British
- Diet: Gluten-Free
Nutrition
- Serving Size: 2 Tbsp
- Calories: 110 kcal
- Sugar: 12g
- Sodium: 50mg
- Fat: 8g
- Saturated Fat: 5g
- Unsaturated Fat: 3g
- Trans Fat: 0g
- Carbohydrates: 13g
- Fiber: 0g
- Protein: 1g
- Cholesterol: 80mg